Sometimes when I feel like I don't have time to cook dinner, Mihai steps in and often comes up with something new and delicious. Case in point is this salad with avocado, bacon, radishes, tomatoes, mâche, and shallot vinaigrette dressing:
This yummy and filling salad was inspired by a similar salad on thepassionatecook, but Mihai made his own variation by using mâche instead of spinach, tomatoes instead of mushrooms and gorgonzola, and red wine vinegar instead of sherry vinegar in the dressing. I must say I was impressed by both his willingness to improvise with what we had at home and the scrumptious result.
Monday, April 27, 2009
Warm Salad with Avocado and Crispy Bacon
Tuesday, April 21, 2009
Weekend Getaway to NYC

Thanks to Boston's Patriots' Day on Monday, MIT's student holiday on Tuesday, and the fact that I have no class on Fridays this semester, Mihai and I got away to NYC for the long weekend. Needless to say, the four days we had there were dedicated to seeing friends and going out to delicious meals.
We started off Friday night by going to Trestle on Tenth (with a few of Mihai's froworkers) and later Against The Grain (where Mihai had been to multiple times but I mysteriously never made it to). Saturday we split up for brunch: I went to Apiary with college roommates and Mihai went to Yuca with another Princeton friend. Saturday dinner was at The Harrison, where I had a cucumber-y tequila drink I actually enjoyed so much so that we had to ask the waitress for the kind of tequila they used (Sauza Silver). My olive-oil poached cod was delicious as well, as were everyone's entrees (lamb chop, pork chop, and calf's liver).
Sunday brunch was had at Clinton Street Baking Co, after a 2+ hour wait - we blamed the nice weather for having to wait the originally quoted time. And Sunday dinner featured Aquabites at Aquagrill, along with more fantastic seafood (truffle-encrusted cod, lobster/grapefruit/avocado salad, oysters). On Monday we stopped by WorkSmart Labs and were treated to lunch there as well, and visited Kefi's new and much expanded location for dinner. Finally, we treated ourselves to omakase sashimi lunch at Sushi Yasuda before catching the train to back to Boston.
All in all, a most fun weekend hanging out with many friends and eating many delicious meals, not to mention multiple sightings of cute golden retrievers, such as Creampuff here: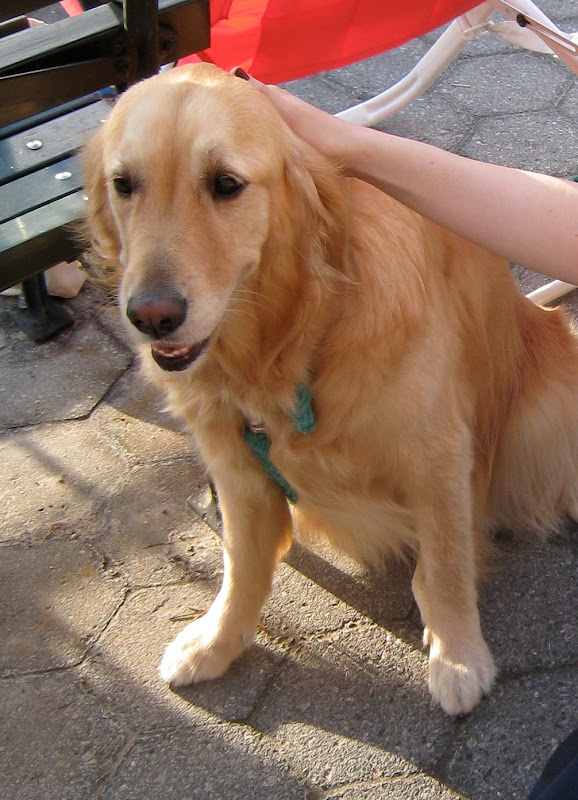
Saturday, December 29, 2007
Cookie Party: Cranberry-Orange Slice-and-Bake Cookies
The third cookie we had at this high school get-together is the cranberry-orange version of the slice-and-bake cookies Deb posted about on Smitten Kitchen. (There are many reasons to admire Deb, not the least of which is that all these delicious cookie recipes were posted while she was actually on vacation in the Caribbean - that is amazing preparation.) I've made similar slice-and-bake cookies before, usually the (Meyer) lemon sablés from Amanda Hesser's Cooking for Mr. Latte (and Orangette's adaptation). This "fillings" version was quite good, but I am not convinced I don't prefer the simpler lemon version instead.
Cranberry-Orange Slice-and-Bake Cookies
Adapted from Smitten Kitchen
2 sticks unsalted butter, at room temperature
¾ cup confectioners’ sugar, sifted
1 large egg yolk, at room temperature
Pinch of salt
1 teaspoons vanilla or almond extract
2 cups all-purpose flour
grated zest of 2 oranges
½ cup finely chopped dried cranberries
1. Put the butter in the bowl of a mixer fitted with the paddle attachment and beat at medium speed until it is smooth. (I used a handheld mixer.) Add the sifted confectioners’ sugar and beat again until the mixture is smooth and silky. Beat in the egg yolk, followed by the salt and the orange zest and chopped cranberries. Reduce the mixer speed to low and add the flour, beating just until it disappears. It is better to underbeat than overbeat at this point; if the flour isn’t fully incorporated, that’s OK - just blend in whatever remaining flour needs blending with a rubber spatula. Turn the dough out onto a counter, gather it into a ball, and divide it in half. Roll each half into a log that is about 1 to 1¼ inches thick. Wrap the logs in plastic and chill for 2 hours. (The dough can be refrigerated up to 3 days or stored in the freezer for up to a month.)
2. Position the racks to divide the oven into thirds and preheat the oven to 350°F. Line two baking sheets with parchment paper.
3. While the oven is preheating, roll cookie logs in any coatings of your choice. Then, using a sharp slender knife, slice each log into cookies about ⅓ inch thick. (You can make the cookies thicker if you’d like; just bake them longer.) Place the cookies on the lined baking sheets, leaving about ½ inch space between them.
4. Bake the cookies for 12 to 14 minutes, or until they are set but not browned. Transfer the cookies to cooling racks to cool to room temperature.
Keeping: Packed airtight, the cookies will keep for about 5 days at room temperature, or in the freezer for a month. Unbaked logs can be frozen for longer.
Makes about 50 cookies.
Thursday, December 27, 2007
Cookie Party: Chewy Cocoa Cookies with Chocolate Chips

Another successful cookie from my high school friends get-together came from Orangette. Molly posted about these Chewy Cocoa Cookies a couple of months ago, and she certainly has good reason to praise them - they were delicious, although much better with milk (the next morning) than with tea (what my friends had them with). As she correctly points out, they are also a breeze to make - the one cookie out of the three I made for this occasion that I could start making the day they were to be eaten. (I had to make the dough for the other two the day before so as not to spend all morning in the kitchen.)
Chewy Cocoa Cookies with Chocolate Chips
Adapted from Orangette
1 cup unbleached all-purpose flour
¼ teaspoon baking soda
⅛ teaspoon salt
4 tablespoons (1/2 stick) unsalted butter
⅔ cup granulated sugar
⅓ cup light brown sugar
7 tablespoons unsweetened cocoa powder
⅓ cup plain yogurt, preferably not low- or nonfat
1 teaspoon vanilla extract
½ cup chocolate chips, preferably Ghirardelli brand, either semisweet or bittersweet
1. Preheat the oven to 350°F. Line a baking sheet with parchment paper.
2. In a small bowl, whisk together the flour, baking soda, and salt.
3. Place the butter in a medium microwave-safe bowl, and microwave briefly, until just melted. Add the sugars, and sift in the cocoa. Stir to blend well. The mixture will be somewhat thick and pasty, like wet sand. Add the yogurt and vanilla and stir to mix thoroughly. Add the dry flour mixture, and stir to just combine. Add the chocolate chips and stir to incorporate.
4. Drop the dough by generous tablespoons onto the prepared baking sheet. Bake for 9 to 11 minutes, or until the tops of the cookies have crackled slightly and look set. Transfer the sheet pan to a wire rack, and cool the cookies on the pan for 10 minutes. Transfer them to the rack to cool completely. Repeat with remaining dough.
Makes about 20 cookies.
Monday, December 24, 2007
Cookie Party: Austrian Shortbread
Whenever I go to visit my parents during the holiday season, I always check to see if any of my good high school friends are around and are interested in getting together. Two of them were home for Christmas, so we met at my parents house for an afternoon. This was a great opportunity for me to try out some of the cookies I'd been reading about recently (and not so recently). A great recipe posted in December appeared on Smitten Kitchen. It was for Austrian Raspberry Shortbread. The pictures accompanying the recipe made me salivate, and my mom's house was the perfect setting for making it, since my mom owns a food processor and I (due to space constraints) do not. This was definitely a winner - even my mom, who at first declared it was too doughy (she would have used more jam and less dough) warmed up to it later. I sent my friends home with some of the leftovers, and one of the moms later sent my mom a card expressing how much she had liked it.
Austrian Raspberry Shortbread
Adapted from Smitten Kitchen
1 lb (4 sticks) unsalted butter, slightly softened
4 egg yolks
2 cups granulated sugar
4 cups all-purpose flour
2 teaspoons baking powder
¼ teaspoon salt
Optional additions: 1 teaspoon vanilla extract or 1 teaspoon lemon zest (I stupidly forgot to add either one of these)
1 cup raspberry jam, at room temperature
¼ cup confectioners’ sugar
1. Cream the butter in a mixer fitted with a paddle attachment (or using a hand mixer) until soft and fluffy. Add the egg yolks and mix well.
2. Mix the granulated sugar, flour, baking powder, and salt together. Add to the butter and egg yolk mixture and mix just until incorporated and the dough starts to come together. Turn the dough out onto a floured work surface and form into two balls. Wrap each ball in plastic wrap and freeze at least 2 hours or overnight (or as long as a month, if you like).
3. Heat the oven to 350°F.
4. Remove one ball of dough from the freezer and coarsely grate it by hand or with the grating disk in a food processor into the bottom of a 9×13-inch baking pan or a 10-inch tart pan with a removable bottom. Make sure the surface is covered evenly with shreds of dough. (One suggestion I have is to first cut the dough up into smaller pieces with a big knife or cleaver, since you cannot put the whole big ball of dough into the food processor. Cutting it up becomes much easier if you don't do it as soon as you take it out of the freezer.)
5. With a piping bag with a wide tip or a zip-lock bag with the corner cut off, squeeze the jam over the surface as evenly as possible, to within ½ inch of the edge all the way around. (Be careful not to cut too big of a corner off the zip-lock bag, like I did, or the jam will come out in too thick a stream.) Remove the remaining dough from the freezer and coarsely grate it over the entire surface.
6. Bake until lightly golden brown and the center no longer wiggles, 50 to 60 minutes (or longer). As soon as the shortbread comes out of the oven, dust with confectioners’ sugar.
7. Cool on a wire rack, then cut in the pan with a serrated knife.
Friday, December 21, 2007
2007 Holiday Party: Savory Food

For the savory snacks for our holiday party, we had four things: walnut, pear, and roquefort madeleines, salmon rillettes, mushroom caviar, and crudités. Unfortunately, we forgot to take pictures of the last three things on that list, and so all I have is a picture of the madeleines. These madeleines were an interesting idea, but I am not sure I'd make them again. I will definitely make the salmon rillettes and mushroom caviar again, and crudités are always a fun, easy addition (ours were with cucumber, baby carrots, and radishes this time).
Salmon Rillettes
Adapted from David Lebovitz
8 oz (250 g) pieces of salmon, bones removed
salt
5 tablespoons unsalted butter
1 tablespoon olive oil
1½ tablespoons fresh lemon juice
2 tablespoons chopped chives
4 oz (125 g) smoked salmon, cut into thin strips, then cut into ½-inch pieces
1. Season the salmon on both sides lightly with a bit of salt. Steam in a steamer basket until just cooked, about 8 minutes. Once cooked, remove from heat and let cool.
2. In a medium-sized bowl, mash together with a fork the butter and the olive oil until very smooth. (This is very important; otherwise there'll be big chunks of butter in the finished rillettes.)
3. Stir in the lemon juice, then the chopped chives and smoked salmon.
4. Remove the skin from the salmon and flake the cooked salmon over the mixture, then fold the pieces of salmon into the rillette mixture. Season with salt, if necessary.
5. Scrape into a serving dish, cover, and chill for at least two hours. Let come to room temperature before serving.
Storage: The rillettes can be made up to two days before and refrigerated. They can also be frozen, well-wrapped, for up to two months.
Mushroom Caviar
Adapted from Simply Recipes
3 tablespoons butter
½ lb cremini mushrooms, wiped clean and finely chopped
Salt (and pepper)
½ cup of minced shallots
1 tablespoon dry white wine
1 garlic clove, minced
2 tablespoons pine nuts
2 tablespoon sour cream
2 teaspoons lemon juice
1 tablespoon chopped parsley
1. Melt butter in a large skillet on high heat. Add the mushrooms and shallots. Sauté for 5 minutes stirring frequently.
2. While the mushrooms are cooking, heat a small skillet on high heat. Add the pine nuts. Cook, stirring frequently, until they begin to get a little toasted. (Keep your eyes on the nuts, they can burn pretty quickly.) As soon as they begin to toast, remove the pan from the heat and put the pine nuts into a small bowl. Set aside.
3. While the mushrooms are cooking, sprinkle lightly with salt and pepper. Once they have cooked for about 5 minutes, add the garlic and a tablespoon of dry white wine. Cook for an additional minute and remove from heat. Put mushroom mixture in a bowl, add the toasted pine nuts, and set aside to cool.
4. Once the mushrooms have cooled down a bit, mix in the lemon juice, sour cream, and parsley. Add more salt and pepper, if needed, to taste. Chill before serving.
Serve with crackers or baguette slices.
Makes about 1½ cups. Serves four. (I was afraid this would not be enough and so I doubled all of the ingredients - that was entirely unnecessary, unless you want to make enough caviar for two parties.)
Thursday, December 20, 2007
2007 Holiday Party: Almond Crescents
The third and last sweet snack we had for our party were the almond crescents from Simply Recipes. I will have to try making these again when I am not also making lots of other things and am less pressed for time, because shaping them was quite a challenge, and I am curious if I can make them prettier if I can devote more time to shaping each cookie. We had leftover ganache from making the chocolate kisses and so we dipped the ends of some of the cookies into it. These dipped cookies were definitely the more popular ones.
Almond Crescents
Adapted from Simply Recipes
1 cup butter, room temperature
⅔ cup sugar
1 teaspoon vanilla extract
1 teaspoon almond extract
2½ cups flour
1 cup almond flour (can substitute ground almonds*)
¼ cup powdered sugar for sprinkling
*You can use slivered, blanched almonds and grind them up, but you will have a very crumbly, hard to work with dough. It’ll still taste good though. (This is what I did, and the dough was, indeed, very hard to work with. Since I haven't tried using almond flour yet, I cannot comment on how much easier it would have been had I followed the recipe more accurately.)
1. Cream the butter and the sugar together until light and fluffy. Add the extracts and mix.
2. Add the flour and almond flour. Mix thoroughly.
3. Take generous tablespoons of the dough (it will be slightly crumbly) and roll it into a small ball, about an inch in diameter, and then shape into a crescent shape. Place onto parchment paper and bake at 350°F for 15-20 minutes or until a light golden brown.
4. Dust with powdered sugar.
For added decadence let the cookies cool and dip one end of them into some melted chocolate, then let the chocolate harden. (I had some trouble melting the chocolate without adding any liquid to it, but as noted above, using the ganache from the chocolate kisses worked great.)
Makes about 2½ dozen cookies.
Subscribe to:
Posts(
Atom)